Trade License
A Trade License provides permission to start a particular Business.
Navigation
- Open the Survey App.
- Once opened and enter your Username and Password, then click on the Login button.
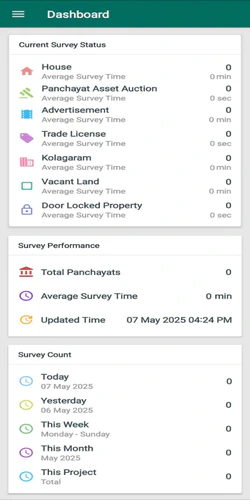
- Once you log in, you will be taken to the Dashboard screen and click on the Menu at the top left corner.
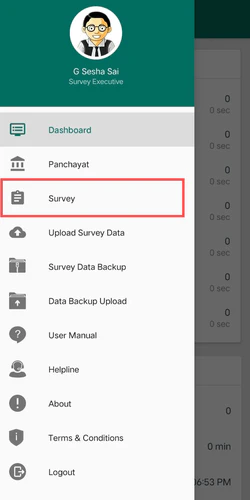
- Select the Survey from the Menu.
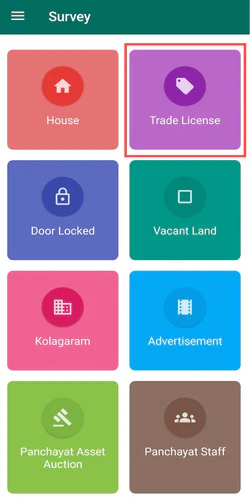
- After clicking on the Survey, you will be moved to the Survey Screen, then look for the Trade License and click on it.
List
From the Survey Screen, click on the Trade License, and it moves to the List Screen. The List screen displays different sections i.e., Title, Statistics, Record.
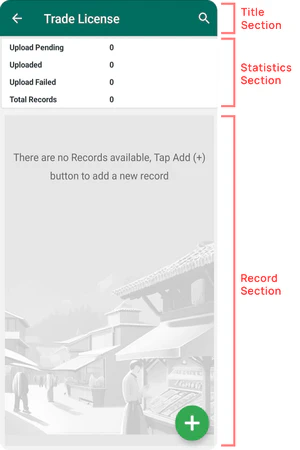
Title Section
At the top of the List Screen, you will able to see the following information :
- Property Title : Trade License
- Back Icon : It is located at the top left corner, and if you click on this Back ( ← ), you will be moved to the Survey Screen.
- Search Icon : It is located at the top right corner, and if you click on this Search icon, it allows you to Search for records using fields like Trade License Name, Trade License Category, Owner Name, Owner Aadhaar Number, Owner Mobile Number.
Statistics Section
In the Statistics Section, you will see the following information :
- Upload Pending Records : The number of records Pending to Upload.
- Uploaded Records : The number of records that are Successfully Uploaded.
- Upload Failed Records : The number of records that Failed to Upload.
- Total Records : The total number of records (Upload Pending, Uploaded, Upload Failed).
Record Section
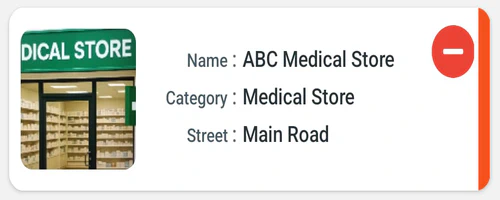
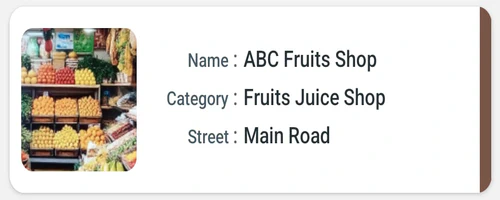
In the Record Section of the List Screen, you can see a list of all created records.
- The list of created records are categorized by color codes based on their status, which are displayed on the right side of each record.
Blue : The record is created but Not Uploaded.

Green : The record is created and Successfully Uploaded.

Orange : The record is created but Failed to Upload.
Brown : The record is created but Uploaded through Backup.
- If the List Screen is empty, a message will be displayed as " There are no records available, Tap Add (+) button to add a new record “.
Create
On the List Screen, click on the Add "+" button which is located at the bottom right corner and then it moves to Create Screen.
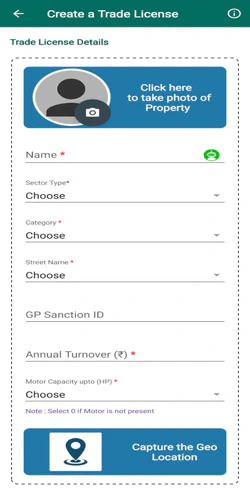
Title Section
At the top of the Create Screen, you will able to see the following information :
- Property Title : Create a Trade License
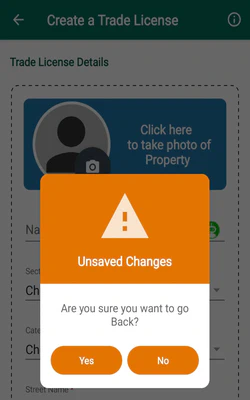
- Back Icon : It is located at the top left corner and if you click on the Back ( ← ) then Dialogue Box displays as “Are you sure you want to go Back ?".
- Click ” Yes “ button, you will be moved to the List Screen.
- Click ” No “ button, you will remain on the Create Screen.
- Click ” Yes “ button, you will be moved to the List Screen.
- Information icon : It is located at the top right corner and if you click on this Info(), you can see some instructions to create a Trade License Record.
Input Section
You must fill all the Mandatory fields(*) on the Create Screen.
- Click on the Camera section and use your Device Camera to take a photo of the Trade License (Mandatory Field).
- If you click on the Next button without taking the photo of the property then a message displays at the bottom of the screen as “Please Capture the Property Photo using Camera”.
- Enter the Trade License Name (Mandatory Field).
- Trade License Name should only start with alphabets and numbers but not with special characters.
- Trade License Name is unique (Duplicate Name is not allowed).
- Allowed Characters _ - / @ # & . A-Z a-z 0-9
- Minimum Length 3
- Maximum Length 64
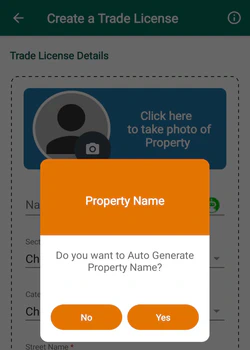
If you click the Auto Generate button of Trade License Name, an Dialogue Box will be displays a message as “Do you want to Auto Generate Property Name?" and then click OK button on the Dialogue Box to Auto Generate the Property Name in the Confirmation Screen.
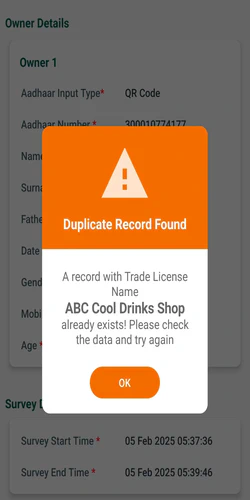
- If you enter the same “Trade License Name” then Dialogue Box displays as “A record with Trade License Name already exists! Please check the data and try again”.
- Click on the OK button on the Alert Box to Edit the record.
- Trade License Name should only start with alphabets and numbers but not with special characters.
- Choose the Sector Type from the dropdown (Mandatory Field).
If the Sector Type is NGO or Private, you must provide the owner details manually. If the Sector Type is Public, default owner details will be created automatically.
- Choose the Category from the dropdown (Mandatory Field).
Please select the Sector Type before choosing a Category.
- Click on the Search Bar to search the Trade License Category.
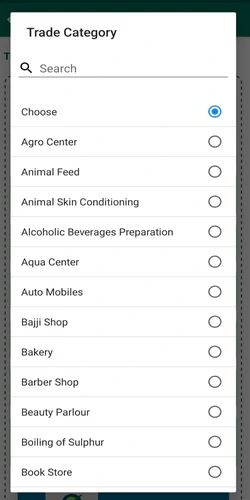
- By default, Choose option is selected in the dropdown, If you don’t select any the Category then a message will be displayed at the bottom of the Screen as ” Please Select Trade License Category “.
Government Educational institutions, Government Hospitals and Government Offices are part of trade but do not have to pay tax.
- Click on the Search Bar to search the Trade License Category.
- Choose the Street Name from the dropdown where the Trade License property is located (Mandatory Field).
- The Street Name should only start with numbers or alphabets, but not with special characters.
- Allowed Characters _ - / @ # & . A-Z a-z 0-9
- Minimum Length 3
- Maximum Length 64
- If the Street Name is not available in the dropdown, select Others option at the bottom of the dropdown to enter the Street Name in the provided text field.
- The newly added Street Name will be included in the dropdown for the next records.
- If you enter a street name in the Others text field that is already listed in the dropdown, a message will be displayed at the bottom of the screen as “Street Name already exists”.
- The Street Name should only start with numbers or alphabets, but not with special characters.
- Enter the GP Sanction Id.
- GP Sanction Id should only start with numbers or alphabets, but not with special characters.
- GP Sanction Id is unique (Duplicate Id is not allowed).
- Allowed Characters _ - / @ # & . ( ) A-Z a-z 0-9
- Minimum Length 3
- Maximum Length 32
- GP Sanction Id should only start with numbers or alphabets, but not with special characters.
- Enter the Annual Turnover (Rs) of the Trade License (Mandatory Field).
The Annual Turnover will be displayed in Words at the bottom of the field.
- Allowed Characters 0-9
- Minimum Length 3
- Maximum Length 9
- Allowed Characters 0-9
- Choose the Motor Capacity (in HP) value from the dropdown (Mandatory Field).
- By default, Choose will be selected, If you won’t select any option then a message will be displayed at the bottom of the Screen as “Please Select Motor Capacity”.
If the Trade License does not use a motor, select “0” from the dropdown.
- By default, Choose will be selected, If you won’t select any option then a message will be displayed at the bottom of the Screen as “Please Select Motor Capacity”.
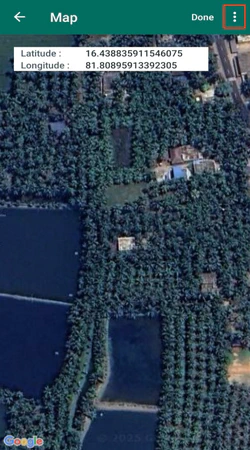
- To Capture the Location, click on the Capture the Geo Location section (Mandatory Field).
- Pin the exact point of the Trade License Property on the map and click Done, then the screen moves back to the Create Screen.
- If you don’t know the current location, click on the three dots(⋮) at the top right corner. Three options will appear as : Pin Current Location, Pin Previous Location, and Pin Landmark Location.
- Pin Current Location : The Pin will be marked near to the Current Location.
- Pin Previous Location : The Pin will be marked at the Previous Location.
- Pin Landmark Location : The Pin will be marked at the Landmark Location.
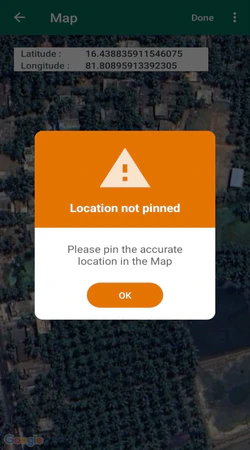
- If you click Done without pinning the Location of the Trade License property, an Alert Box will be displays a message as ” Please pin the accurate Location in the Map “ and then click OK button on the Alert Box to pin the Location.
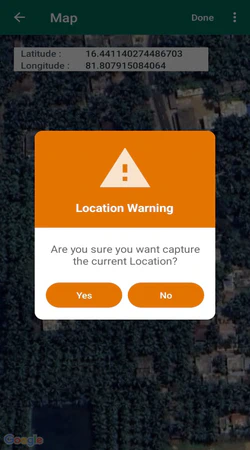
- If you click Back ( ← ) on the Map Screen after pinning the Location then an Alert Box will display a message as “Are you sure you want to capture the current Location ? “.
- Click ” Yes “ button, you will be moved to the Create Screen and Location will be captured.
- Click ” No “ button, you will be moved to the Create Screen and Location will not be captured.
- Click ” Yes “ button, you will be moved to the Create Screen and Location will be captured.
- If you don’t know the current location, click on the three dots(⋮) at the top right corner. Three options will appear as : Pin Current Location, Pin Previous Location, and Pin Landmark Location.
- If you Click Done after capturing the Location, the Geo Location section will be updated by the message displaying Geo Location Captured.
The Geo Location helps the Survey Executive to locate the Trade License property on the map.
- Enter Owner Details.
- For Further Owner Details, please click here .
- You can add Multiple Owners by clicking on " + Add Owner " , if needed.
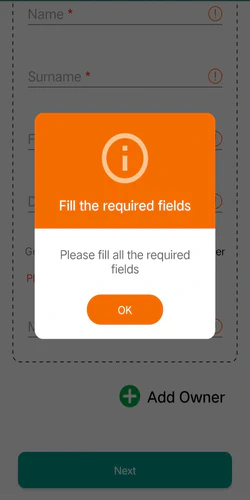
- Once all the required fields are filled, click on the Next button which is at the bottom of the Screen, then it moves to the Confirmation Screen.
- If you Click on the Next button without entering all mandatory fields then an Alert Box will display a message as “Please fill all the required fields”.
Confirmation
On the Create Screen, click on the Next button and it moves to the Confirmation Screen.
Title Section
At the top of the Confirmation Screen, you will able to see the following information :
- Property Title : Trade License
- Back Icon : It is located at the top left corner and if you click on this Back ( ← ) you will go back to the Create Screen.
- Map Pin : It is located at the top right corner and if you click on this icon, you can see your Trade License Location.
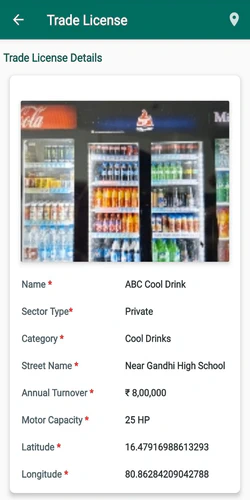
Details Section
- Verify all the details displayed on the Confirmation Screen.
- To view your Trade License Location, click on the Map Pin in the Confirmation Screen.
- Click on the Finish button at the bottom of the Screen it moves to the List Screen.
- In the List Screen, it displays the newly created Trade License Records.
View and Edit
On the List Screen, clicking on a record will move you to the View Screen.
Title Section
At the top of the View Screen, you will able to see the following information :
- Property Title : Trade License
- Back Icon : It is located at the top left corner and if you click on this Back ( ← ) you will go back to the List Screen.
- Edit : If you click on the Edit, you will be moved to the Edit Screen to modify the changes.
- Map Pin : If you click on this Map Pin, you can view the Trade License location.
Details Section
Editing can only be done before the Trade License Record is uploaded.
- Review the details in the View screen.
- If changes are needed, click on the Edit to make the necessary changes.
- Click on the Next button and it moves to the Confirmation screen.
- Click on the Finish button to save the changes.
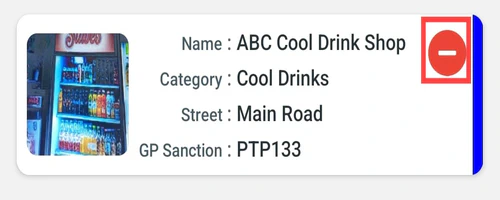
Delete
Deletion can only be done before the Trade License Record is Uploaded.
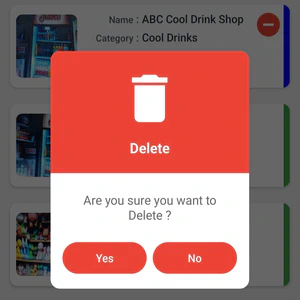
- From List Screen, If you want to delete any particular record, click on the minus " - " sign which is located on the top right corner of the record.
- After Clicking on minus " - " sign, then an Dialogue Box displays as “Are you sure you want to Delete ?"
- Click ” Yes “ buttonano /home/sayukthit/Documents/ps-sb-doc-survey/content/survey-properties/trade-license/child-1-survey.en.md/_index.en.md n, if you want to Delete the record.
- Click ” No “ button, if you don’t want to Delete the record.